SiteGround’s simplified 3-step installation process will install WordPress with a theme and the most common plugins in under 2 minutes, with almost no effort from your side. The custom-developed WordPress Starter plugin is available to all clients and is designed to help people take their first steps in the WordPress world like a pro.
Let’s walk together through the steps of setting up your website with SiteGround!
STEP 1: EASY WORDPRESS INSTALLATION
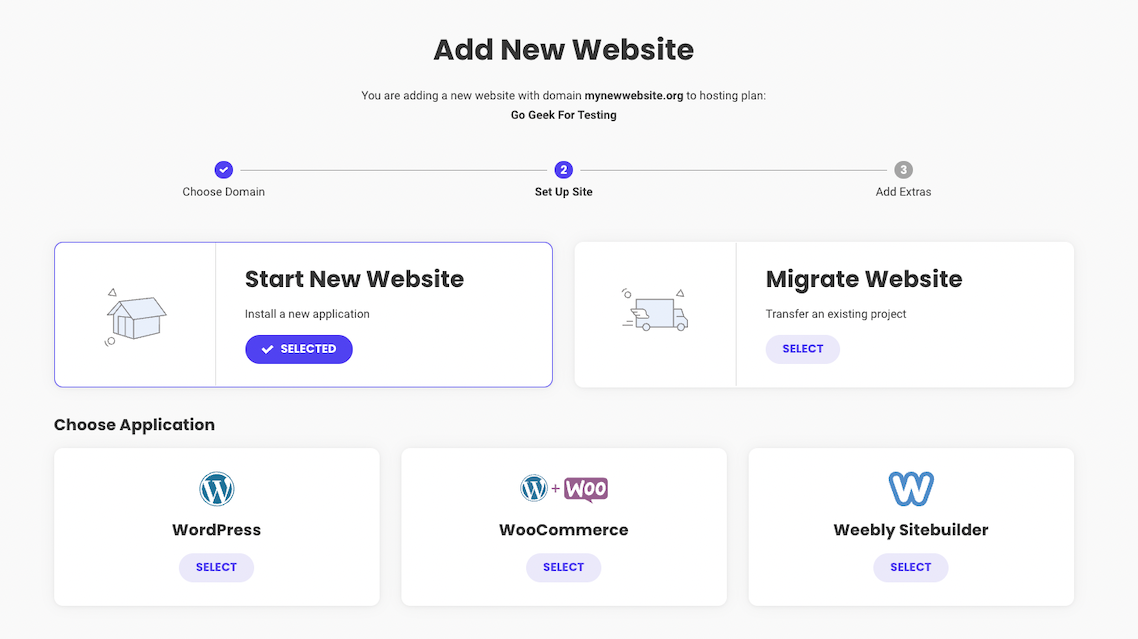
First, you’ll need to install the application for building your website, in our case – WordPress. When you log in for the first time in your Client Area, you’ll see a welcome message and a button “SET UP WEBSITE” which will take you directly to the installation process.
On the next step, select Start New Website and WordPress as your application of choice.

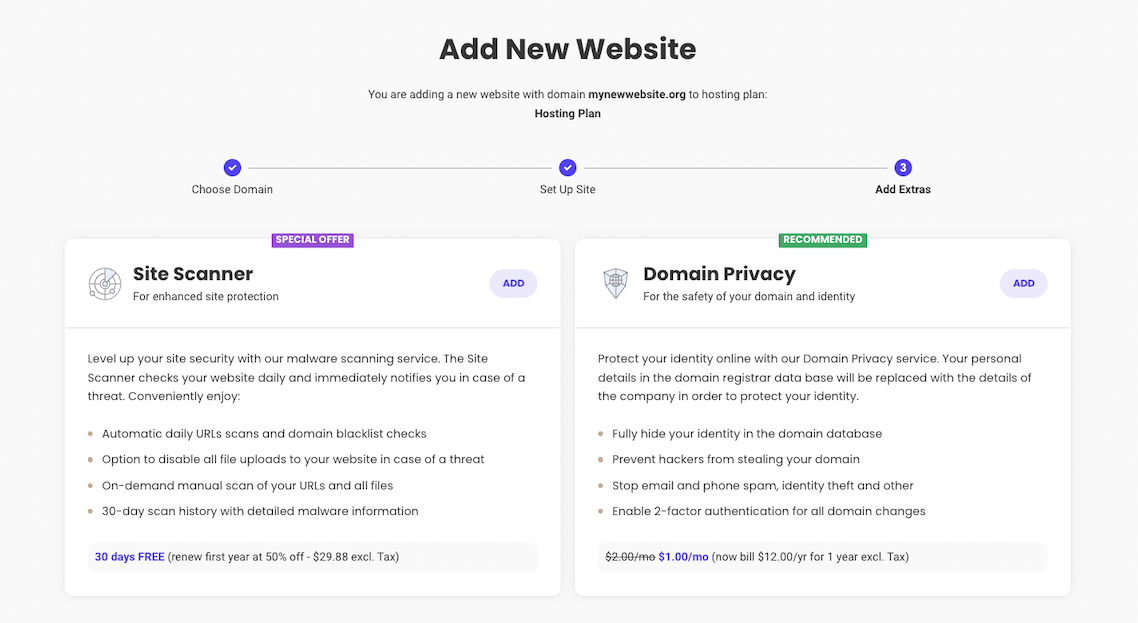
Finish the installation process by choosing whether to add extra services, such as SG Site Scanner, which scans your website every day and alerts you immediately if your website has been hacked or compromised with malicious code.

At the end, click on Finish and wait while WordPress is being installed.
STEP 2: CHOOSE A THEME
Once the WordPress installation has finished you will be prompted to the WordPress Starter wizard. Simply click on Start Now. You can choose a theme from a wide selection of free SiteGround-curated, modern and professionally-designed themes.
Our preferred site theme is GeneratePress. It’s a free theme that is pretty bare bones which allows you build it according to your vision.
Your theme can be switched at anytime without too much problem so don’t let picking a theme be the step that stops you from building your website. Pick one that you like the look of, it can always be changed later.

Note that SiteGround’s recommended themes will come with pre-filled sample content, enabled by the intuitive drag-and-drop page editor that SiteGround provides by default. This will help you easily visualize how the actual content would look like before you substitute it with your own website copy.
STEP 3: ADD PLUGINS TO EXPAND FUNCTIONALITY
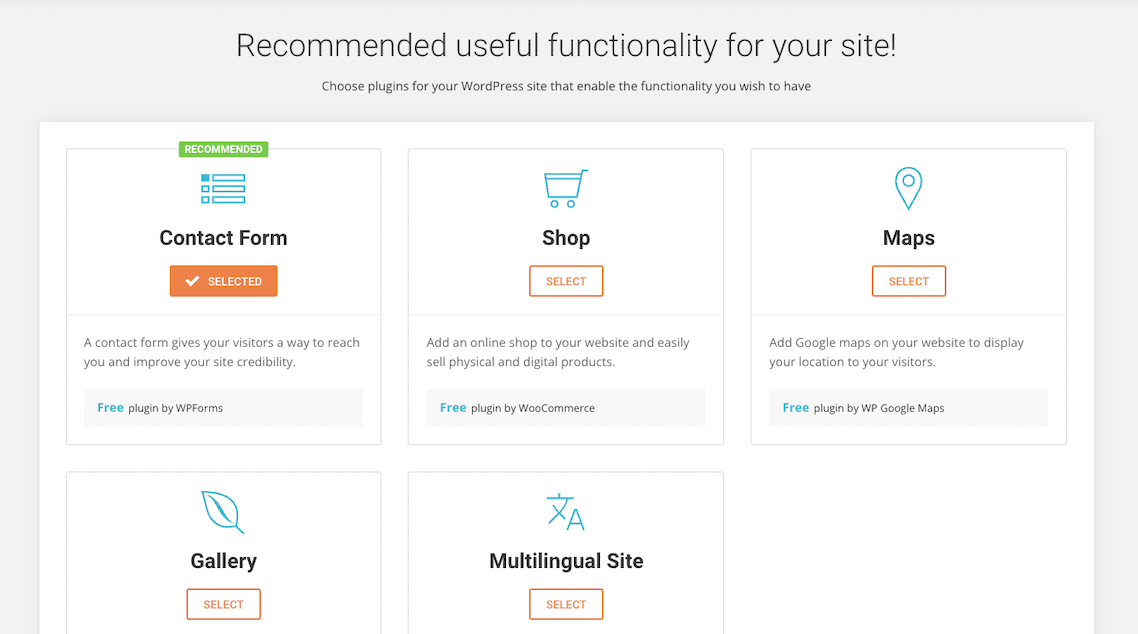
Once you get the right design for your site, on the next step you can add some useful plugins such as:
Contact Form – so your website visitors have an easy way to contact you;
WooCommerce – transform your site into an online store;
Google analytics plugin – We recommend using RankMath to connect your site to Google Analytics. This will help you monitor your website traffic as well as get insight into your SEO;
Grow Subscribers list – a plugin that will help you to capture your visitor’s emails;

When you’ve made your choice, click Complete. In minutes, your new website will be ready with the content and functionalities you have added. Just log in your site from http://yourdomain.com/wp-admin and start adding content using the custom WordPress dashboard.
Get started with SiteGround today and get a great website setup in just a few minutes.

